Sometimes, not every ticket type applies to every show. With CloudJoi, you can assign different tickets to specific event timings — perfect for matinee discounts, exclusive nights, or different seating setups.
Where to Manage This
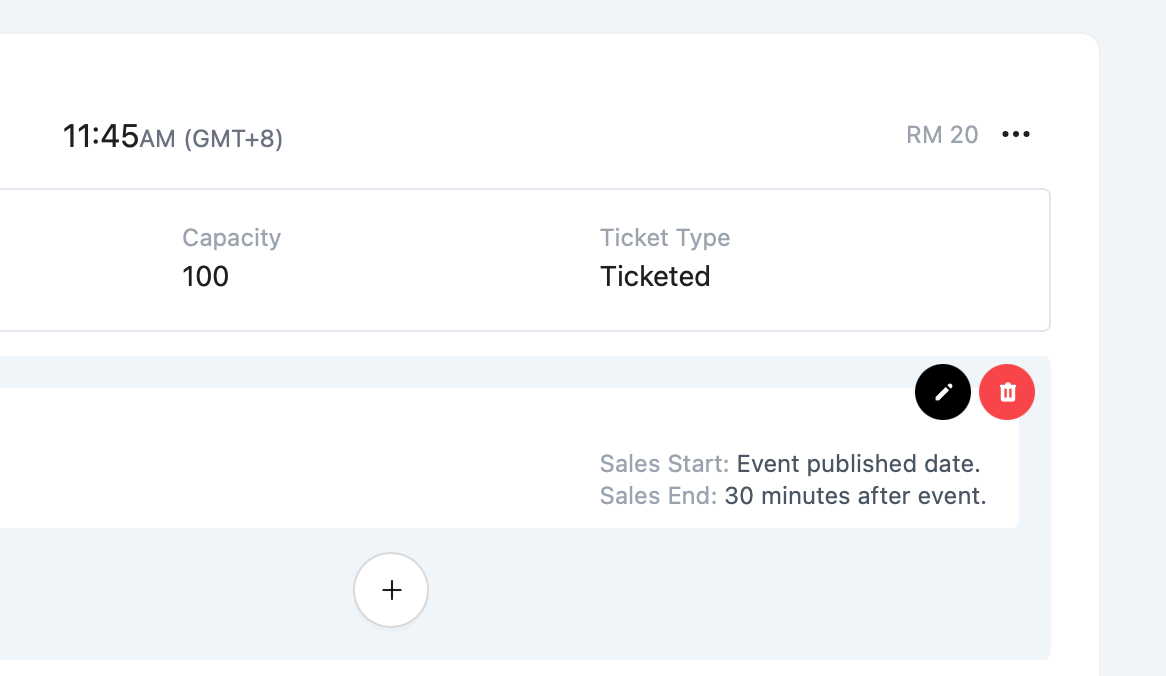
Navigate to the Ticketing tab, then scroll to the Timings & Prices section.
You’ll see a breakdown of each timing you’ve created — along with all the ticket types currently assigned to them.
Default Behavior
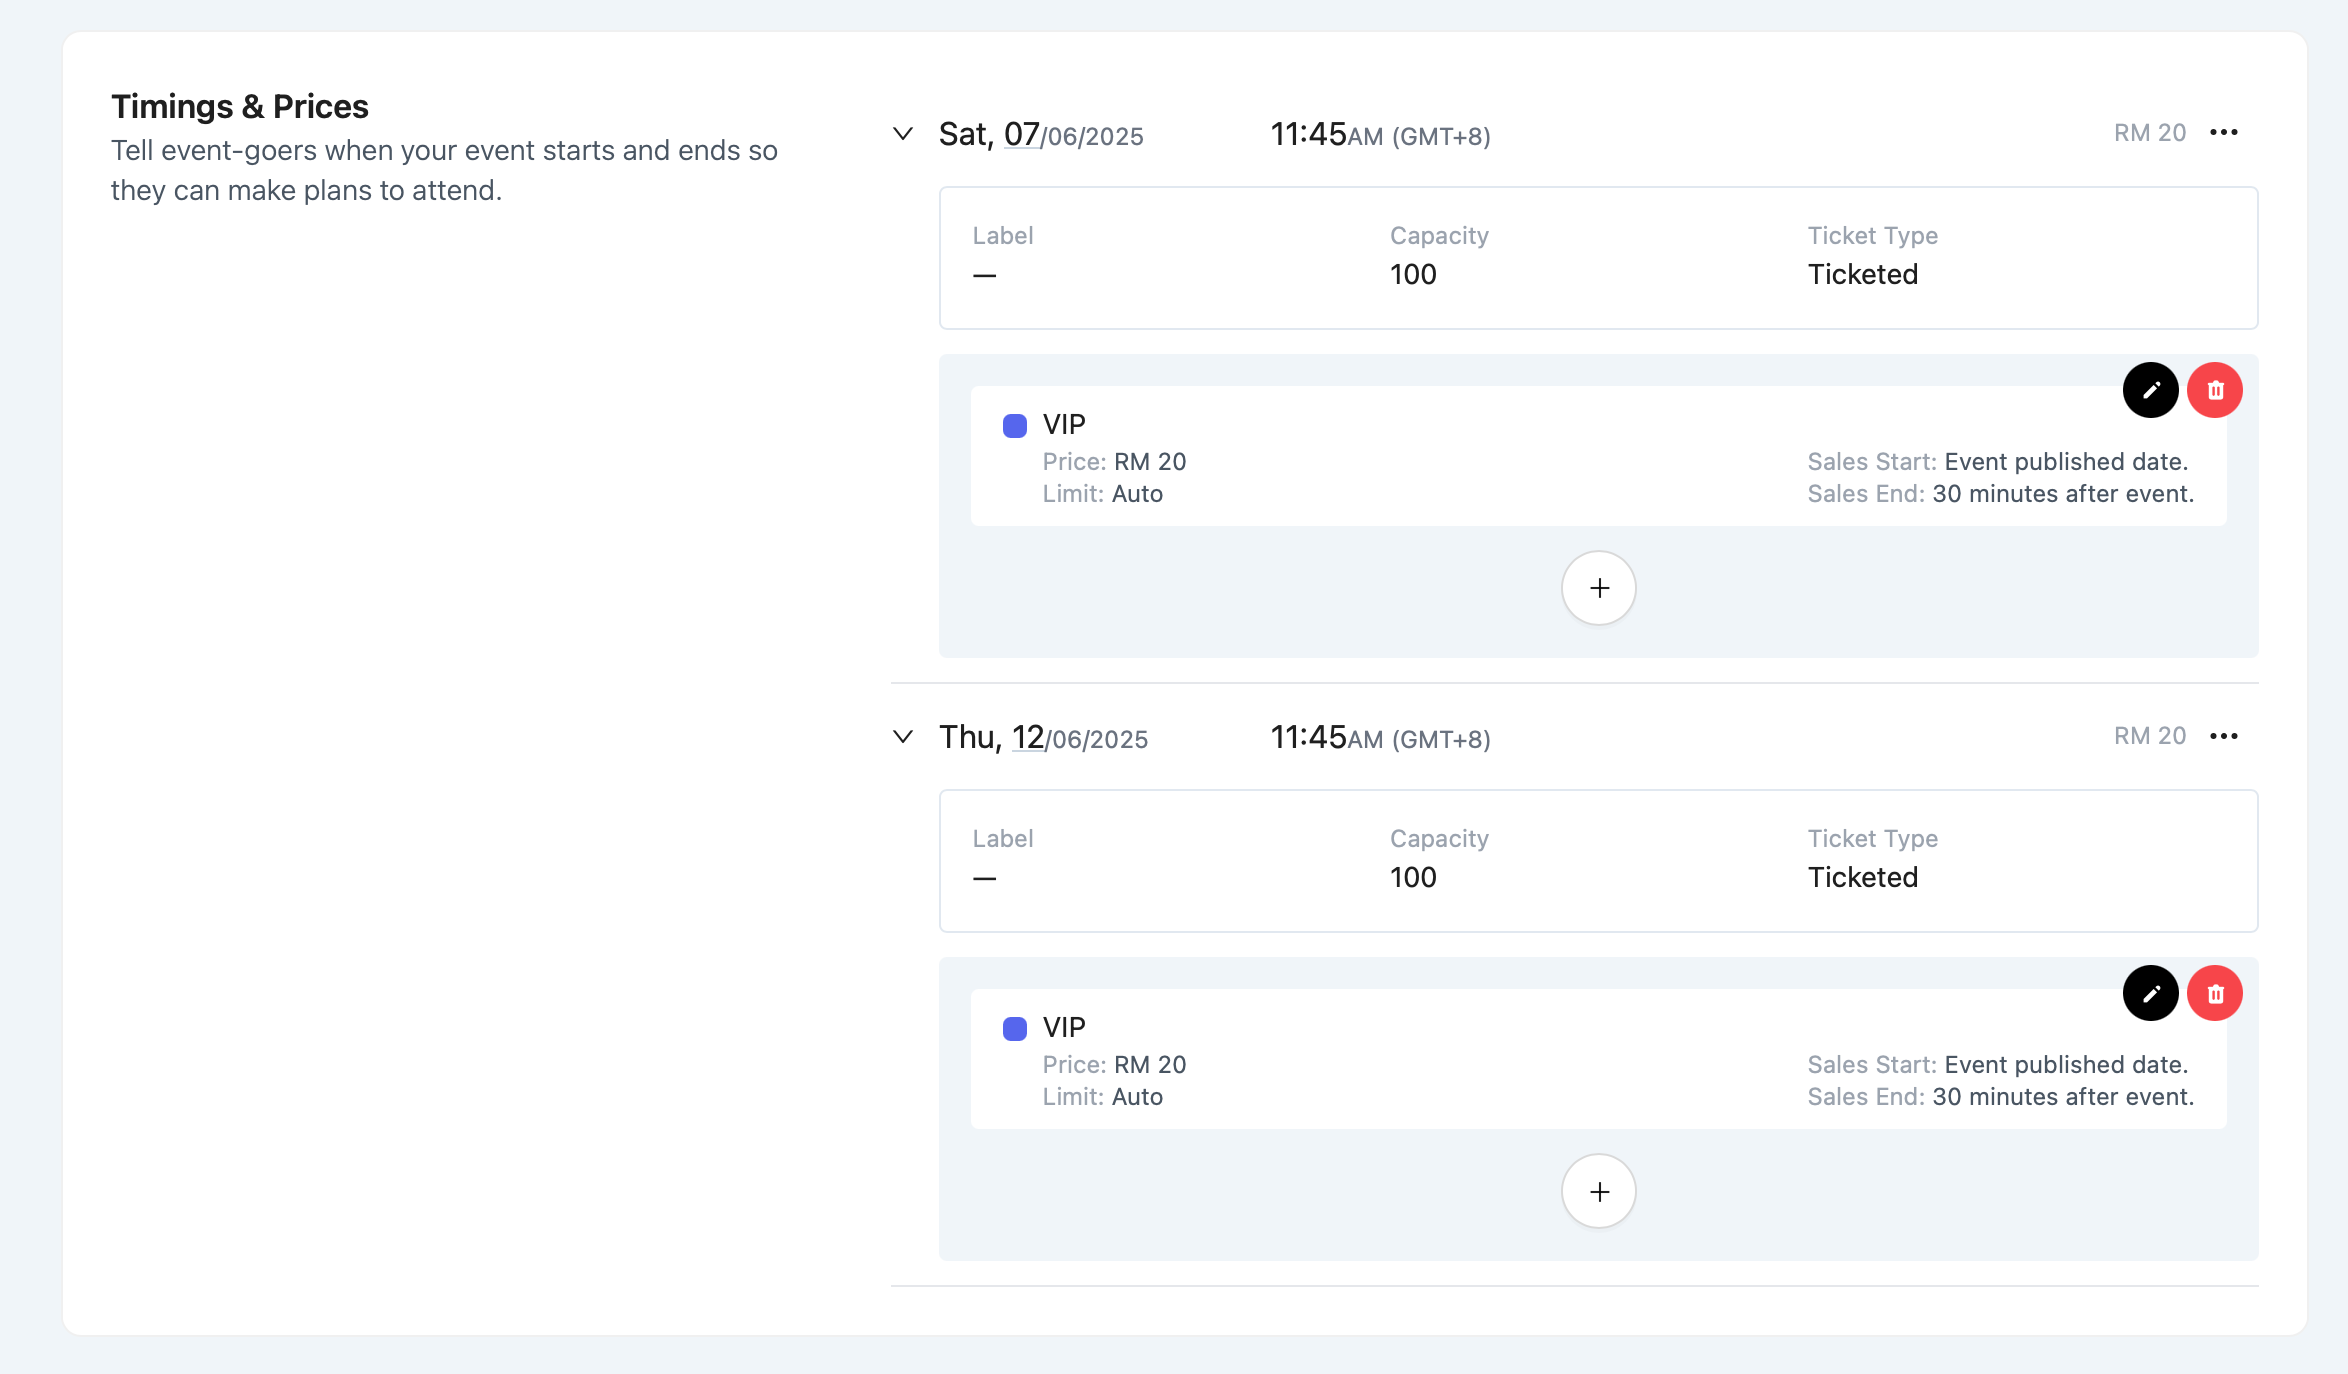
When you create a new ticket type, it's automatically applied to all timings.
This is convenient if you're offering the same tickets across the board — but it’s also fully customisable.
How to Remove a Ticket Type from a Timing
-
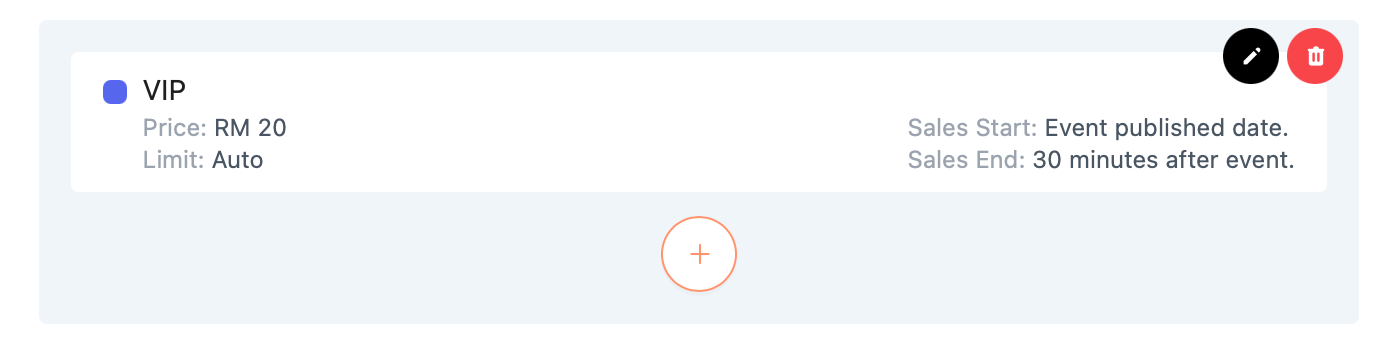
Click the red 🗑️ trash icon next to the ticket you want to remove.
-
This action won’t delete the ticket entirely — it just unassigns it from that specific timing.
⚠️ You can only remove tickets from a timing before any orders are placed for that ticket on that timing.
How to Add a Ticket Type to a Specific Timing
-
Click the + button under the timing.
-
Select a ticket tier from the list.
-
Configure timing-specific settings like:
-
Sales Start & End
-
Limit override (if different from the global setting)
-
This is especially useful if a timing has:
-
Limited seating
-
Flash sales or promos
-
Exclusive guest access
Editing Existing Assignments
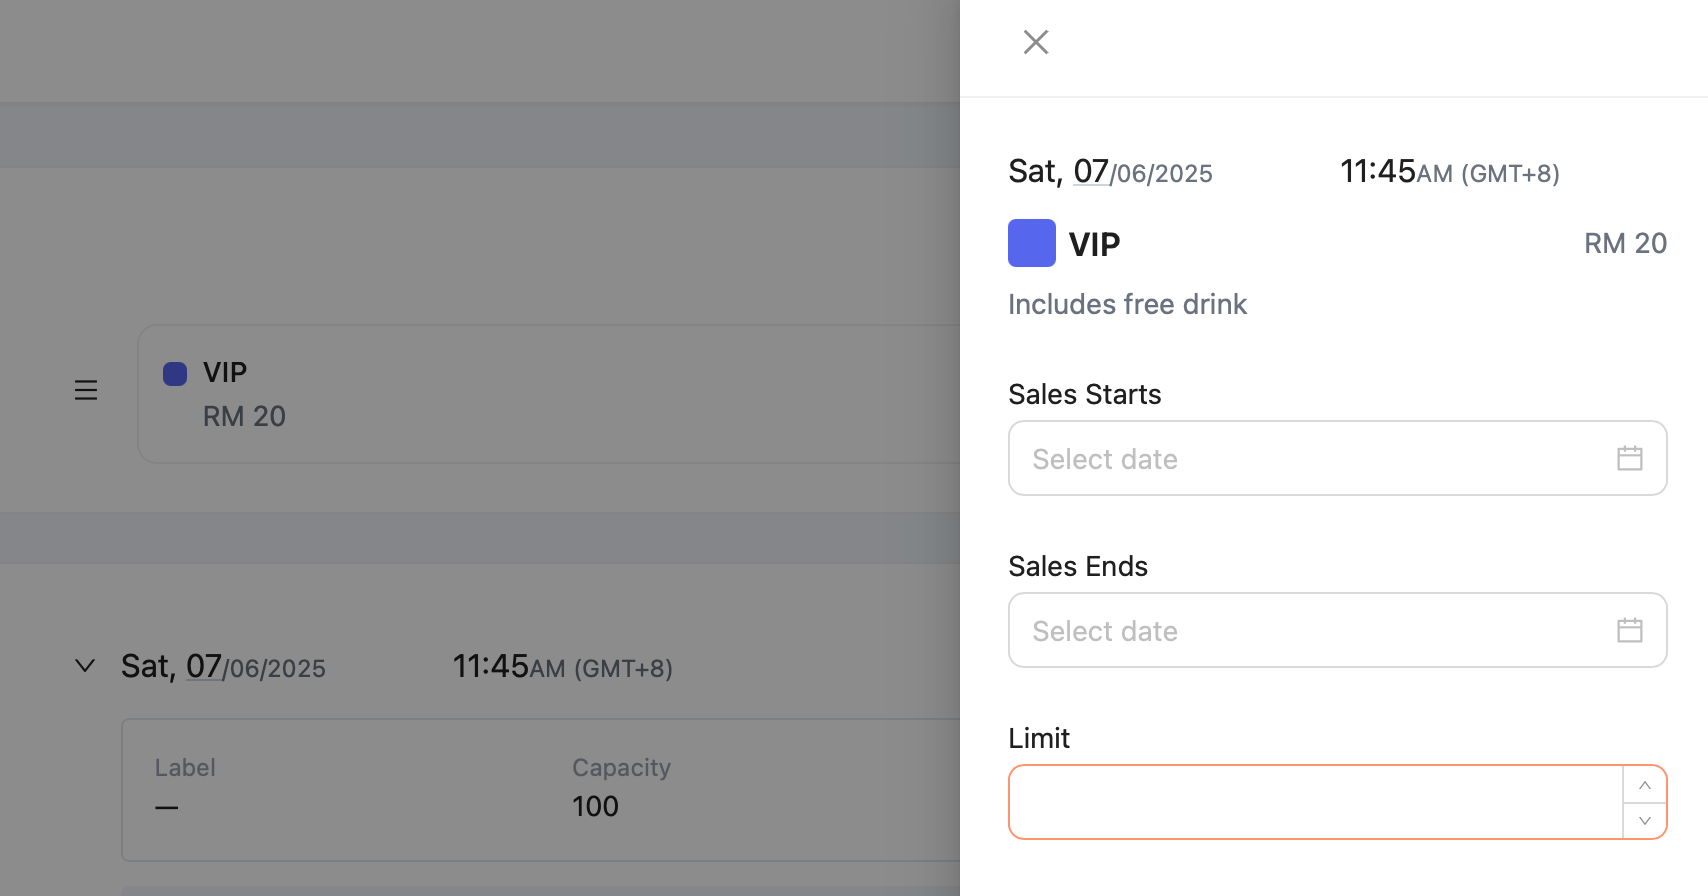
Click the ✏️ pencil icon next to a ticket to:
-
Change ticket sales start/end dates for that timing
-
Set a custom quantity limit
-
Review the display name and price
⏳ By default, ticket sales start when the event is published, and end 30 minutes after the show.
Editing Timing Details (Label & Access Type)
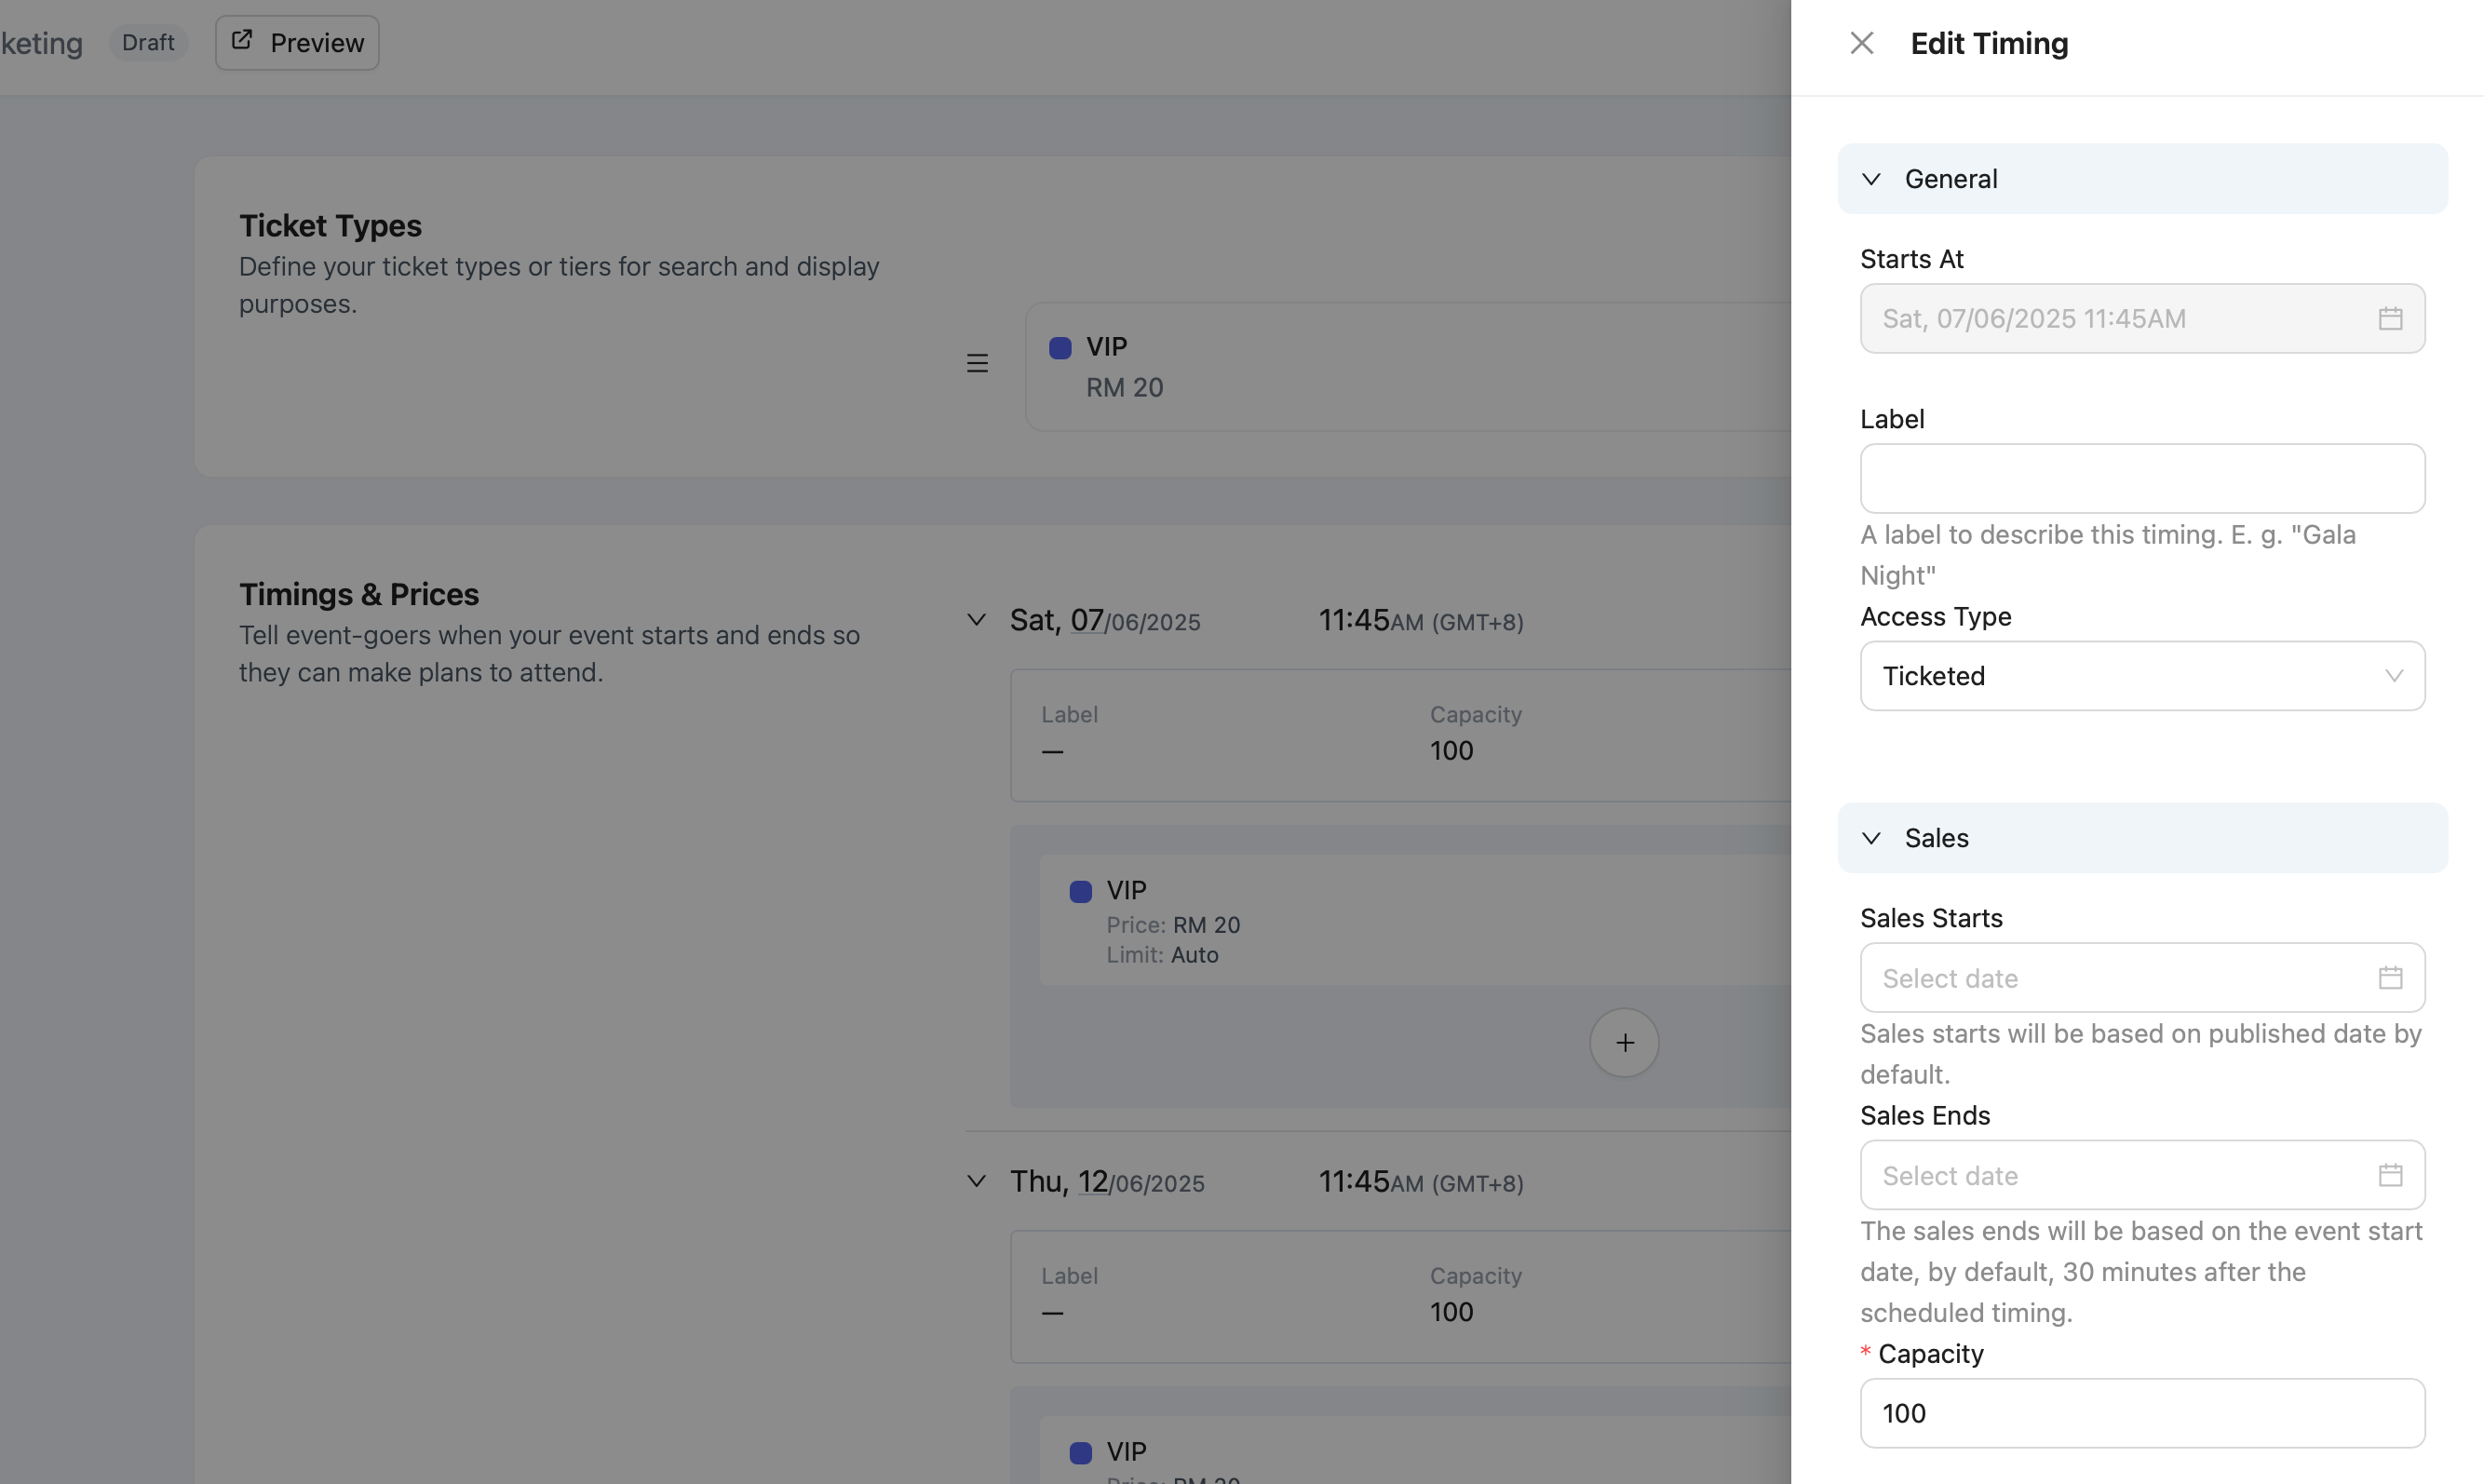
To assign a Label (e.g. “Opening Night” or “Press Preview”) or set the Access Type (e.g. “Ticketed”):
-
Go to the Timings & Prices section.
-
Click the three-dot menu (⋯) beside the timing.
-
Select Edit — a side panel will slide in.
From there, you can:
-
Add a Label to help internally identify the session
-
Choose an Access Type
(Defaults to “Ticketed” — more access types may be added in future)
This is useful when you want to name special sessions or clarify different ticket access formats.