Your ticket tiers are more than just prices — they’re how you shape your event experience. Whether it’s VVIP, Concession, Group of 5, or “Student Early Bird”, CloudJoi gives you the flexibility to name, colour-code, and reorder each ticket type for maximum clarity and sales performance.
This article shows you how to create, customise, and manage your ticket tiers.
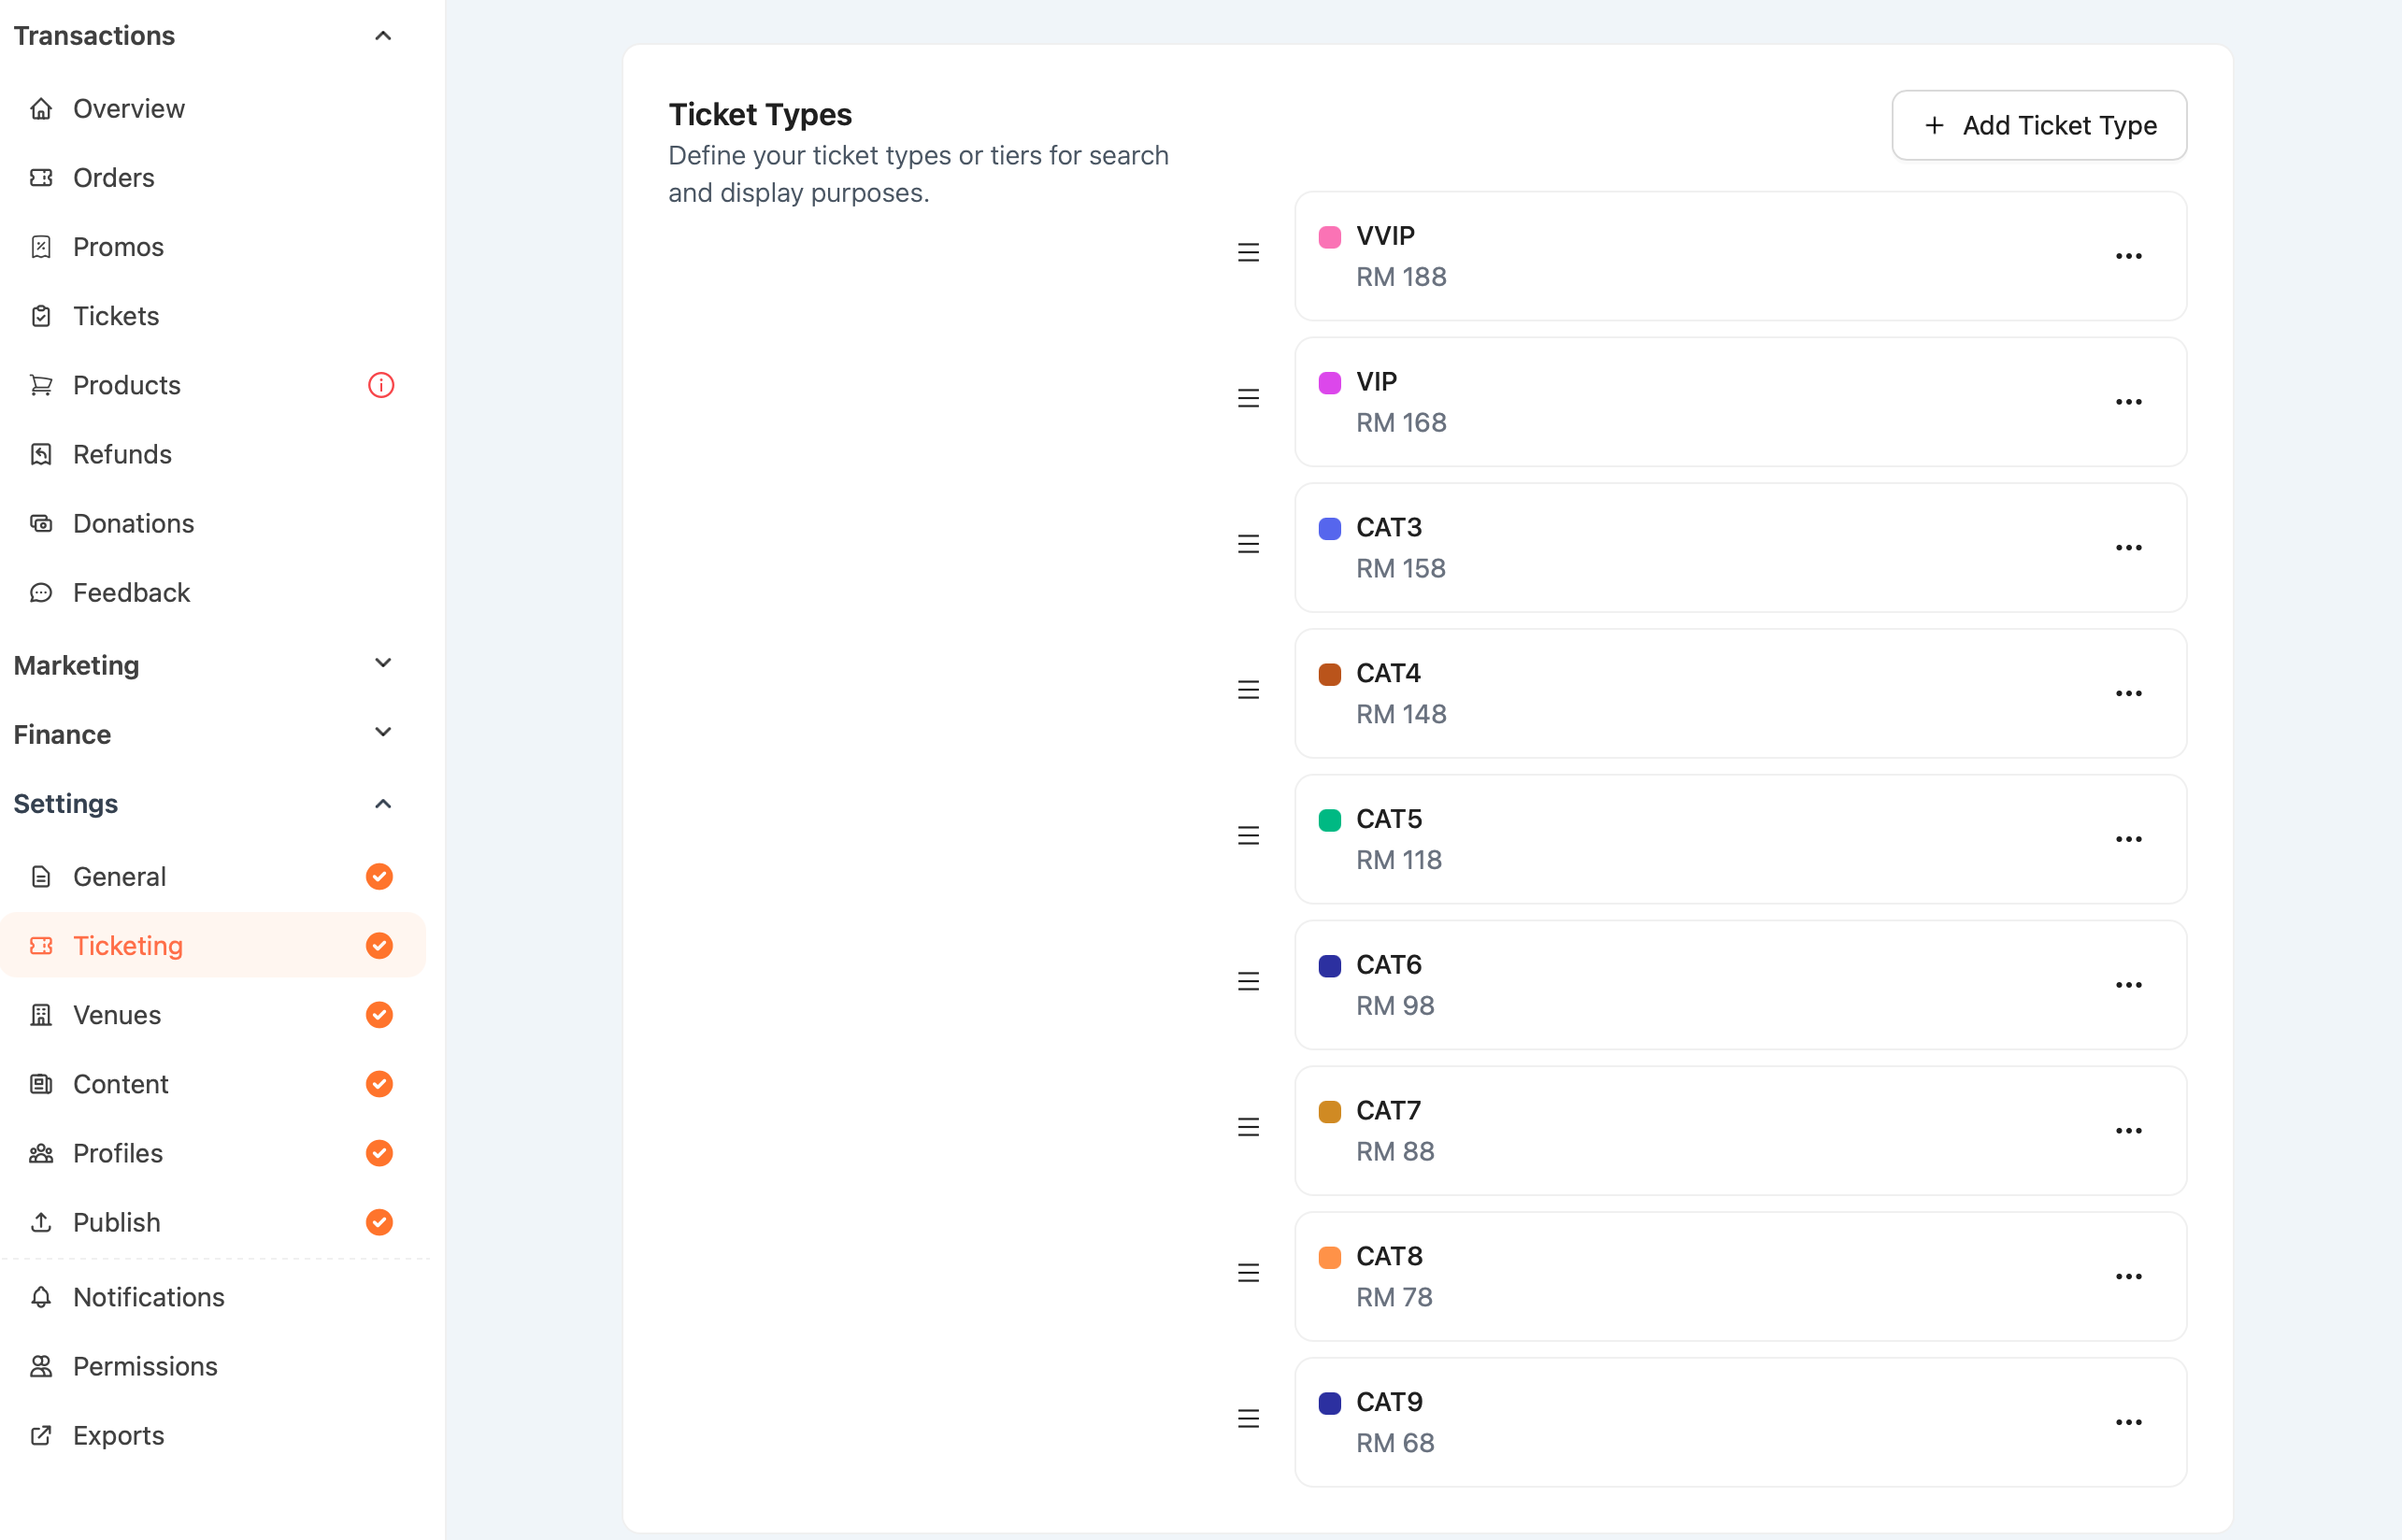
➕ How to Add a New Ticket Tier
-
Go to your event dashboard
-
Navigate to Settings > Ticketing
-
Click “+ Add Ticket Type”
You’ll see a panel to configure:
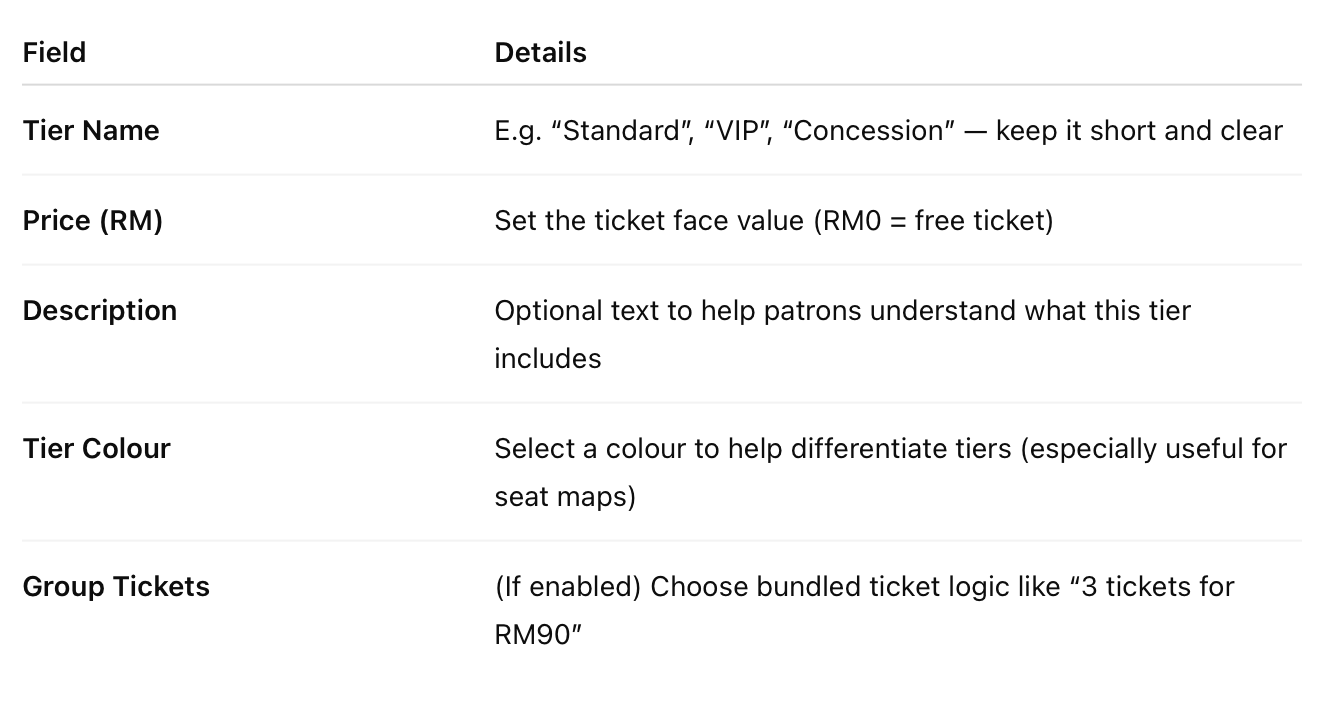 💡 Tier name and description will appear on the event page and during checkout.
✏️ Editing & Reordering Tiers
-
Click the 3-dot menu next to any tier to Edit or Delete it
-
Drag and drop tiers to reorder how they appear on the checkout page
📌 There’s no limit to the number of tiers. Keep your list clear to avoid patron confusion.
🧼 Best Practices
-
✅ Name tiers with intent: e.g. “CAT A – Front Rows”, “Student (with ID)”
-
🎨 Use colour labels to guide FOH or ticket scanning teams
-
🔒 Consider pairing with hidden tiers if you’re segmenting for private groups